Are you
We are providing the Unofficial build from the Purify OS team. These guys are from XDA forums. Still, Rovo89 (Original developer of Xposed Framework) working on an Official build but if you are that kind of person who is excited to try the things which are new as like me. So, follow the below steps to taste the Xposed Framework on your nougat device.

Table Of Contents
What is Xposed Framework?
Xposed Framework is the framework which allows you to customise the android device from the roots. It is available from the android 4.0+. So many modules are developing day by day for this framework. Prerequisite of the Xposed framework is a rooted device and Custom recovery Installed. Rooting allows you to run a various application which can modify the core part of the OS.
Xposed Installer is necessary to manage the modules. Even you can Uninstall framework through it. There are loads of tweaks you can do with this framework to your Android device. Module plays a vital role to mod or tweaks your device. It’s just a framework that will enhance by its modules. You can download the modules from its store by using the search option.
What is Systemless Xposed framework?
The systemless Xposed framework doesn’t touch the system partitions, but the traditional Xposed framework does. Initially, it was ported to the Magisk Stemless root by the XDA forum member topjhonwu (Original developer of Magisk).
By using the systemless root and Systemless Xposed, you can get OTA updates and Safetynet pass. That will help you to run the application which doesn’t want to run on the Rooted device. The official Xposed framework will disrupt the SafetyNet pass. In my recommendation stick to Systemless Xposed to get the advantages.
If you want to know more about safety net and Pass SafetyNet on most of the android devices Read Here>>
Install Xposed Installer APK
At first Install Xposed installer app on your device by DVD android. This is the latest version which is compactable to this unofficial version. Of course, it has a material design too.
- Download the Xposed installer apk file from Here
- Install the apk file as usual.
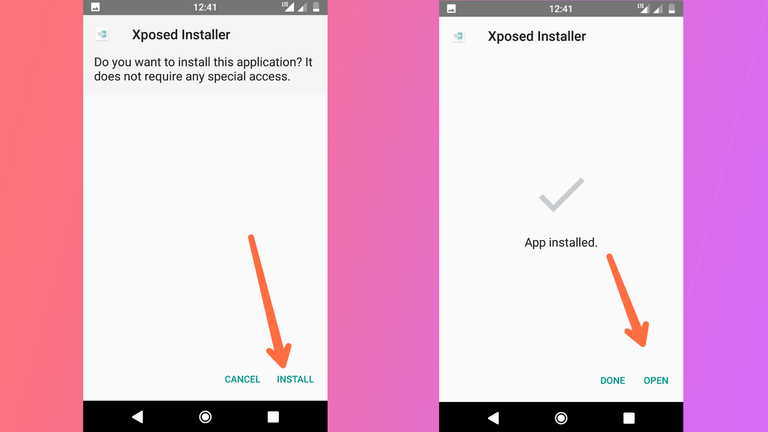
- Open the app you will see the Xposed not installed message. Now, install the framework by below procedure.
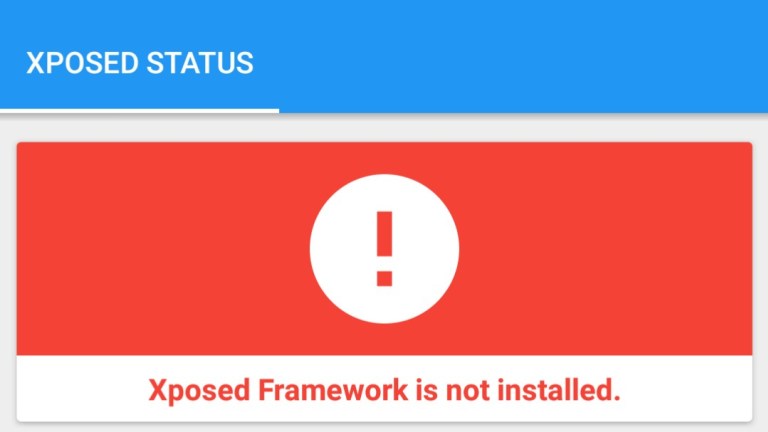
Magisk System-less Xposed-framework on Android 7.0 & 7.1+
I Recommend you to install this build from the Xda developer named as Earny Tech than the normal one. As I said earlier, there is a chance of safety net pass. you can easily install this magisk module with the custom recovery or directly from the magisk manager app.
Xposed magisk module is available for the CPU architecture like an ARM, ARM64, and x86. You don’t need to check the what architecture you are having o your device. It will automatically detect the device architecture itself that is why it is named as universal systemless Xposed. Magisk v13.1+ is the minimum requirement to do its job.
Requirements:-
- Root with Magisk {Guide here}
- Magisk Manager
- Xposed Magisk Module Android 7.0 = SDK24 – Download
- Xposed Magisk Module Android 7.1+ = SDK25 – Download
- Uninstaller – Download
Note:- Download Uninstaller along with the Framework. It will be helpful when your device got bricked.
Steps to install Xposed framework Systemless-ly
- Download the Systemless Xposed according to the Android version 7.0 or 7.1+ from above requirements section.
- Switch off your device and boot into the recovery mode (TWRP)
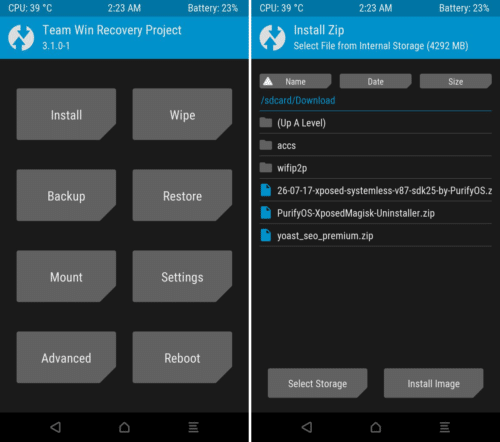
- Click on install button in the home of TWRP
- Select the Zip file from the storage.
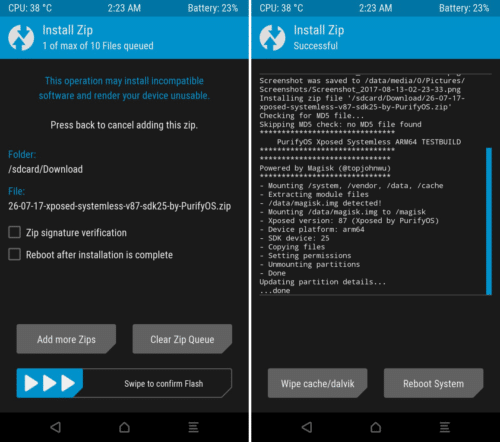
- Install it by Swiping the button. The process will complete in few seconds.
- Now, Click on reboot button. Open the Xposed Installer app; then you will see the Xposed Is active status.
Traditional Xposed-Framework on Nougat
This is a Non-Systemless Xposed framework. It will do some changes on the system partitions. So, you won’t get OTA Updates and failed the safety net check. If you are a magisk user and followed above all the steps, That’s enough. You don’t need to follow this procedure. I am just giving this one for reference only. If you are not a magisk user, then follow below steps.
Even this build available for the ARM, ARM64 and X86 device chipsets.
Requirements:-
- Rooted device
- For Android 7.0 SDK24 – Download
- For Android 7.1+ SDK25 – Download
- Uninstaller – Download
Note:- Download the uninstaller zip according to the Device CPU architecture. When your device stuck in a boot loop then install the Xposed uninstaller zip file.
Steps to Install Xposed framework on android 7.0 & 7.1+
- After downloading the Nougat Xposed-framework files from the requirements section.
- Turn off your device and Try to turn into Custom Recovery Mode.
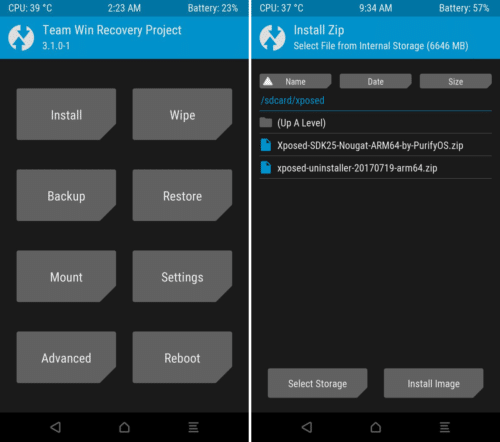
- In the Home page, you will see the install button. Tap on it.
- Now, choose the Zip file which is downloaded from the above.
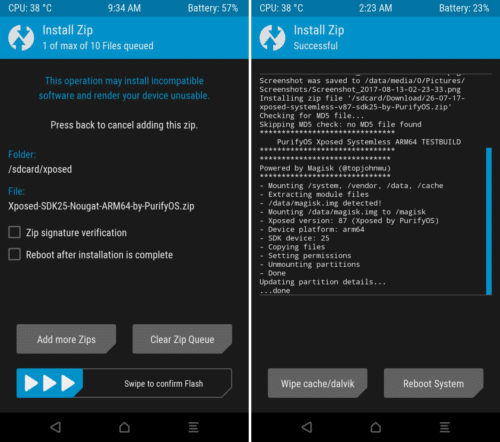
- Complete the process by swiping the button from left to right.
- Now, wait for some time. Click on reboot button.
- Your device will open normally. Open Xposed Installer app you can see the Xposed is the active message.
Final Words:
These are the two ways to install Xposed Framework on android device. The first one does not change the system partitions so, it is the best and reliable method. So, root with magisk Su and hide your root access in a better way.
Suggest our guide to your friends that will help us a lot. Thanks for reading our article. Have any doubts regarding this, comment below we will get in touch as fast as possible.


Hi Venkat
This is really very nice and informative article.
Thanks for sharing this and keep posting amazing article like this.
Hey Akhilesh,
Thanks for your valuable comment. Keep visiting our blog for an amazing topics. By the way no one is here named with Venkat.
I have installed it on my device 7.1.2 it successfully got flashed but the app is showing not active still… Can you say why…. And how could I solve it …. I need it for HushSms Class 0Sms
Hi,
Good article, Thanks for sharing.
very nice and informative article.
Thanks for sharing
hi very nice blog first time here but was amazing experience
good post..
thanks for sharing.
keep the good work
Thanks you sir
Wow .this article is quite help full for us.
Thank you posting.
hi very good article
thanks for sharing keep up the good work
Very nice site,keep on posting. And also thanks for sharing.
Wow .this article is quite help full for us.
Wow .this article is quite help full for us.
Thank you posting.
Very nice site,keep on posting. And also thanks for sharing.
very good bro keep it on
bro you rock i luv it
Very Informative Article Actually Recently I Purchased An Android Phone 8.0 And I Want To Root It I Checked Many Information Over The Internet But None Of Them Useful For Me
Can You Please Tell Me How To Root Android Oreo 8.0
Even on Android Xda I not found Anything related To Rooting Of Android 8.0
Thanks for sharing this great blog ,keep on posting.
Hi, very good article.
Thanks for sharing. keep up the good work
Great. Thank you For Sharing This Post. This is the very nice blog first time here but was the amazing experience.
O meu está dando erro
– Copying zip to temp directory
– Installing xposed-sdk25-topjohnwu.zip
– Mounting /system, /vendor
Archive: /data/user/0/com.topjohnwu.magisk/cache/install.zip
inflating: common/XposedBridge.jar
inflating: common/post-fs-data.sh
inflating: config.sh
inflating: module.prop
*******************************
Xposed framework installer zip
*******************************
******************************
Powered by Magisk (@topjohnwu)
******************************
– Extracting module files
Archive: /data/user/0/com.topjohnwu.magisk/cache/install.zip
inflating: META-INF/com/google/android/update-binary
inflating: META-INF/com/google/android/updater-script
inflating: README.md
inflating: arm/system/bin/app_process32
inflating: arm/system/bin/dex2oat
inflating: arm/system/bin/oatdump
inflating: arm/system/bin/patchoat
inflating: arm/system/lib/libart-compiler.so
inflating: arm/system/lib/libart-disassembler.so
inflating: arm/system/lib/libart.so
inflating: arm/system/lib/libsigchain.so
inflating: arm/system/lib/libxposed_art.so
inflating: arm/system/xposed.prop
inflating: arm64/system/bin/app_process32
inflating: arm64/system/bin/app_process64
inflating: arm64/system/bin/dex2oat
inflating: arm64/system/bin/oatdump
inflating: arm64/system/bin/patchoat
inflating: arm64/system/lib/libart-compiler.so
inflating: arm64/system/lib/libart.so
inflating: arm64/system/lib/libsigchain.so
inflating: arm64/system/lib/libxposed_art.so
inflating: arm64/system/lib64/libart-compiler.so
inflating: arm64/system/lib64/libart-disassembler.so
inflating: arm64/system/lib64/libart.so
inflating: arm64/system/lib64/libsigchain.so
inflating: arm64/system/lib64/libxposed_art.so
inflating: arm64/system/xposed.prop
inflating: common/XposedBridge.jar
inflating: common/post-fs-data.sh
inflating: config.sh
inflating: module.prop
inflating: x86/system/bin/app_process32
inflating: x86/system/bin/dex2oat
inflating: x86/system/bin/oatdump
inflating: x86/system/bin/patchoat
inflating: x86/system/lib/libart-compiler.so
inflating: x86/system/lib/libart-disassembler.so
inflating: x86/system/lib/libart.so
inflating: x86/system/lib/libsigchain.so
inflating: x86/system/lib/libxposed_art.so
inflating: x86/system/xposed.prop
inflating: META-INF/MANIFEST.MF
inflating: META-INF/CERT.SF
inflating: META-INF/CERT.RSA
– Found /data/adb/magisk_merge.img
– Mounting /data/adb/magisk_merge.img to /dev/tmp/magisk_img
! /data/adb/magisk_merge.img mount failed…
Failed!
! Installation failed
Eu uso o moto g5s xt1792
try installing xposed within the Magisk Manager app
1. Go to Download Section
2. Search xposed sdk version of your device
3. Click on down arrow mark and tap on Install Button.
4. Reboot.
thanks so much no xposed framwork working for my redmi 4 but your xposed framework work very well . thank you very much once again
Bro..if i have redmi n4 mido.already root my phone with supersu.. i want to use first method.. any tips and how..
install magisk manager and follow that method or uninstall the SuperSu and use this guide to install Magisk https://magiskroot.net/install-download-magisk-manager-latest/
Fake! It’s impossible to pass safetynet with Xposed doesn’t matter system or systemless! Safetynet is running zygote prices which can’t be bypassed for now by Xposed.
Please help…
– Copying zip to temp directory
– Installing xposed-v89.3-sdk25-topjohnwu.zip
– Mounting /system, /vendor
Archive: /data/user/0/com.R7z459AoSjjc9.yb/cache/install.zip
inflating: common/XposedBridge.jar
inflating: common/post-fs-data.sh
inflating: config.sh
inflating: module.prop
*******************************
Xposed framework installer zip
*******************************
******************************
Powered by Magisk (@topjohnwu)
******************************
– Extracting module files
Archive: /data/user/0/com.R7z459AoSjjc9.yb/cache/install.zip
inflating: META-INF/com/google/android/update-binary
inflating: META-INF/com/google/android/updater-script
inflating: README.md
inflating: arm/system/bin/app_process32
inflating: arm/system/bin/dex2oat
inflating: arm/system/bin/oatdump
inflating: arm/system/bin/patchoat
inflating: arm/system/lib/libart-compiler.so
inflating: arm/system/lib/libart-disassembler.so
inflating: arm/system/lib/libart.so
inflating: arm/system/lib/libsigchain.so
inflating: arm/system/lib/libxposed_art.so
inflating: arm/system/xposed.prop
inflating: arm64/system/bin/app_process32
inflating: arm64/system/bin/app_process64
inflating: arm64/system/bin/dex2oat
inflating: arm64/system/bin/oatdump
inflating: arm64/system/bin/patchoat
inflating: arm64/system/lib/libart-compiler.so
inflating: arm64/system/lib/libart.so
inflating: arm64/system/lib/libsigchain.so
inflating: arm64/system/lib/libxposed_art.so
inflating: arm64/system/lib64/libart-compiler.so
inflating: arm64/system/lib64/libart-disassembler.so
inflating: arm64/system/lib64/libart.so
inflating: arm64/system/lib64/libsigchain.so
inflating: arm64/system/lib64/libxposed_art.so
inflating: arm64/system/xposed.prop
inflating: common/XposedBridge.jar
inflating: common/post-fs-data.sh
inflating: config.sh
inflating: module.prop
inflating: x86/system/bin/app_process32
inflating: x86/system/bin/dex2oat
inflating: x86/system/bin/oatdump
inflating: x86/system/bin/patchoat
inflating: x86/system/lib/libart-compiler.so
inflating: x86/system/lib/libart-disassembler.so
inflating: x86/system/lib/libart.so
inflating: x86/system/lib/libsigchain.so
inflating: x86/system/lib/libxposed_art.so
inflating: x86/system/xposed.prop
inflating: META-INF/MANIFEST.MF
inflating: META-INF/CERT.SF
inflating: META-INF/CERT.RSA
– Found /data/adb/magisk_merge.img
– Mounting /data/adb/magisk_merge.img to /dev/tmp/magisk_img
! /data/adb/magisk_merge.img mount failed…
Failed!
! Installation failed
I’m follow ur first instructions but always failed.
.hello Dev..
anyone know’s why it allways fail to boot after patching boot.img with magisk?
it says ‘corrupt boot/recovery prevent to boot normally’
succesfully flash with Sp.Flashtool .also this devices doesn’t have fastboot mode
I’am stuck here ..another way to root needs a custom recovery .and since this device not officially support by TeamWin .I try to port manually ,user @xda also help me port recovery.img .but again ..it fail to boot with same error message.
this is oppo a71 cph1717
hello admin
my phone wileyfox swift 7.1.2 system directory formatted as squashfs, even if you are root you only have the right to read and write
I found a way and installed magisk but I could not install xposed twrp mount system error
I need help
Thank you
i followed systemless instructions, my lg k20+ on nougat seems to be stuck on the splash screen
Hello i installed it with twrp but it looks like if I installed nothing… even it said that it was installed successfully. Can you help me? I can’t uninstall it either so it feels like it doesn’t do nothing.
Is there any xposed available for x86_64 64 bit system
Awesome tutorial – thank you @Magisk Staff!
Magisk can’t be mount on system, device or resource busy,
Same happend when installating Xposed
That Sir topjonwu have given.
I have Redmi 4 miui 11 ,android 7.1 version
Plz tell me what to do..